How to Create Group Email in Outlook: A Guide for Efficient B2B Email Marketing Automation
In today’s fast-paced business environment, effective communication is essential. Whether you’re managing a small team, connecting with clients, or reaching out to a large group of recipients, group emails are a key tool for streamlining communication. For businesses involved in B2B email marketing automation, Outlook provides a straightforward way to manage group emails, saving time and ensuring messages are delivered efficiently. In this guide, we will walk you through how to create a group email in Outlook, especially useful for marketers using automation tools for email marketing to streamline their workflows.
What is B2B Email Marketing Automation?
Before diving into the technical aspects of creating group emails, it’s important to understand B2B email marketing and why it’s crucial. B2B email marketing automation refers to the use of automated tools to send emails to businesses rather than individual consumers. This allows companies to engage potential clients or customers automatically based on specific triggers, such as form submissions, sign-ups, or interactions with content. Using best email marketing automation practices helps improve communication and engagement, delivering personalized content to your business contacts while reducing the manual effort involved in crafting and sending individual emails.
Why Use Group Email in Outlook for B2B Email Marketing?
Outlook is a popular email platform used by many businesses due to its user-friendly interface and powerful features. When it comes to automtion of B2B email marketing group emails in Outlook can be an invaluable asset. By creating a group, you can easily send emails to multiple recipients with just a few clicks, making your email marketing efforts more efficient. Moreover, using best automated email marketing software often integrates seamlessly with Outlook, allowing for better tracking, scheduling, and personalization.
Here’s why you should use Outlook for automation:
- Time-saving: Group emails eliminate the need to send emails individually.
- Organization: Groups help keep track of different client segments and contacts.
- Efficiency: With tools for email marketing, you can schedule messages and automate follow-ups, ensuring your campaign runs smoothly.
Professionalism: Sending emails to a group through Outlook ensures all recipients are handled appropriately, without the need to manually input email addresses.
How to Create a Group Email in Outlook
Creating a group email in Outlook is a simple process, whether you’re using the desktop app or Outlook online. Follow these steps to create a group and start sending bulk emails:
Creating a Distribution List in Outlook (Desktop Version)
- Open Outlook: Start by opening the Outlook desktop application.
- Go to the “People” Tab: In the navigation bar at the bottom, click on “People” to view your contacts.
- New Contact Group: Select “New Contact Group” from the ribbon at the top.
- Name Your Group: Give your group a relevant name. For example, you could name it “Marketing Team” or “Client List.”
- Add Contacts: Click “Add Members,” then choose either “From Outlook Contacts,” “From Address Book,” or “New E-mail Contact.” You can search for existing contacts or manually enter new email addresses.
Save the Group: Once you’ve added all the necessary contacts, click “Save & Close.” Your distribution list will now be available in Outlook.
Using a Distribution List for Group Emails
Now that you’ve created a distribution list, sending emails to that group is easy:
- Compose a New Email: Click “New Email” to start composing a message.
- Add the Group: In the “To” field, type the name of your distribution list.
- Write Your Message: Craft your email as usual. You can even personalize it if you’re using best email automation features.
- Send the Email: When you’re ready, click “Send.” The email will be sent to everyone in your distribution list
Creating a Group Email in Outlook on the Web
If you use Outlook on the web, creating a group email is just as simple:
- Log into Outlook Web: Open your web browser and go to Outlook.com. Sign in with your account.
- Navigate to People: Click on the grid icon at the top left, and select “People.”
- Create a New Group: In the People section, click on “New Group.”
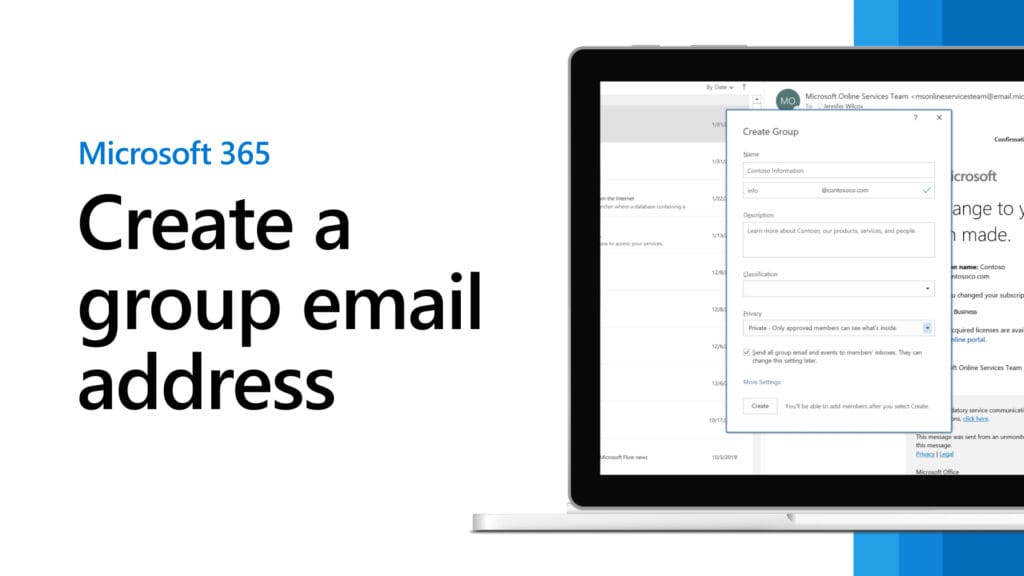
- Set Up the Group: Add a name and description for your group. You can also choose whether you want the group to be public or private.
- Add Members: Type in the email addresses of the people you want to add to the group. You can also add contacts from your address book.
- Save the Group: Click “Create” to finalize the group.
After creating the group, you can use it for sending group emails the same way as in the desktop version.
Leveraging B2B Email Marketing Automation for Group Emails
Once you’ve set up your group in Outlook, integrating B2B email marketing automation tools will further enhance your email campaigns. Automation tools allow you to send personalized emails to large groups without having to manually type each one. This can help you reach your business audience more effectively and efficiently.
For instance, by using best automated email marketing software, you can create email templates that are automatically sent to your groups based on certain triggers, such as a new subscription, product inquiry, or customer behavior. This can save significant time while still delivering highly targeted content.
Benefits of Using Automation Tools for Email Marketing
Time Efficiency:
By using tools for email marketing, you can send emails to thousands of people with minimal effort. You don’t need to worry about manually sending each email or updating email lists.
Personalization:
Automation tools allow you to personalize messages at scale, tailoring them to each contact based on their past behavior or preferences. This increases engagement and conversion rates.

Segmentation:
You can segment your contacts based on various criteria, ensuring that your emails are relevant to each group of recipients.
Analytics:
Automation tools often come with built-in analytics, allowing you to track open rates, click-through rates, and conversions, helping you refine your email marketing strategy
Choosing the Best Automated Email Marketing System
When selecting best email automation tools for Outlook, you need to consider several factors:
- Ease of Use: Look for tools that are simple to integrate with Outlook and are user-friendly.
- Features: Ensure the software supports the features you need, such as email templates, personalization, scheduling, and reporting.
- Integration: The best automated email marketing system should work seamlessly with your existing Outlook account and other tools you use, such as CRM systems.
- Customer Support: Choose a tool that offers excellent customer support to help you troubleshoot any issues that arise.
Popular option include platform like Refly, Mailchimp, ActiveCampaign, and HubSpot, which integrate with Outlook and provide comprehensive email marketing automation features.
Conclusion
Creating a group email in Outlook is an effective way to streamline communication for your B2B email marketing automation needs. By following the steps outlined in this guide, you can quickly set up a distribution list and start sending bulk emails to your contacts. For even greater efficiency, integrating best email marketing automation tools with Outlook will help you send personalized, automated emails to your groups, saving you time while increasing the effectiveness of your campaigns. Remember, combining Outlook’s powerful features with tools for email marketing like Reflys can help you run your email marketing efforts more efficiently and grow your business in the competitive B2B space.
Latest Blogs
- All Post
- Blogs
- eCommerce Instagram Automation
- Influencer Marketing Automation
- Instagram DM Automation
- Instagram UGC
- Social Media Management
- Back
- eCommerce Instagram Automation
- Back
- Social Media Management


