
How to Create Segments in Reflys
Customer segmentation is a smart way to organize your contacts. You can segment your audience that would receive the same messages by groups depending on their interests, behavior, or the information they have shared with you. This assists you in meeting and connecting with the right people at the right time.
In Reflys, you can create segments as some tags and custom field filters you have already created in contacts. After the creation of a segment, it is reusable without the need to set the filters again.
Here is how to create your first segment in Reflys.
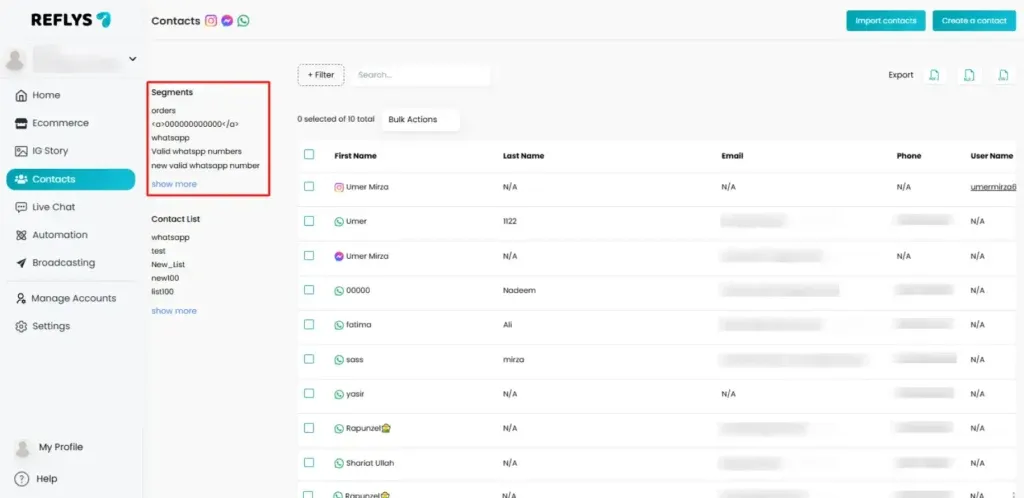
Step 1: Click on the Contacts Section
- Select Contacts on your Reflys dashboard.
- Here, you can find the list of all people who have communicated with your business via WhatsApp, Instagram, or Messenger.
Step 2: Tagging or using Fields
- Segments only work where you have some sort of classification of your contacts.
- This can be done by the addition of:
- Custom Fields → Information like location, product preference, or signup date.
- Apply these Tags or Fields to your contacts before moving ahead.
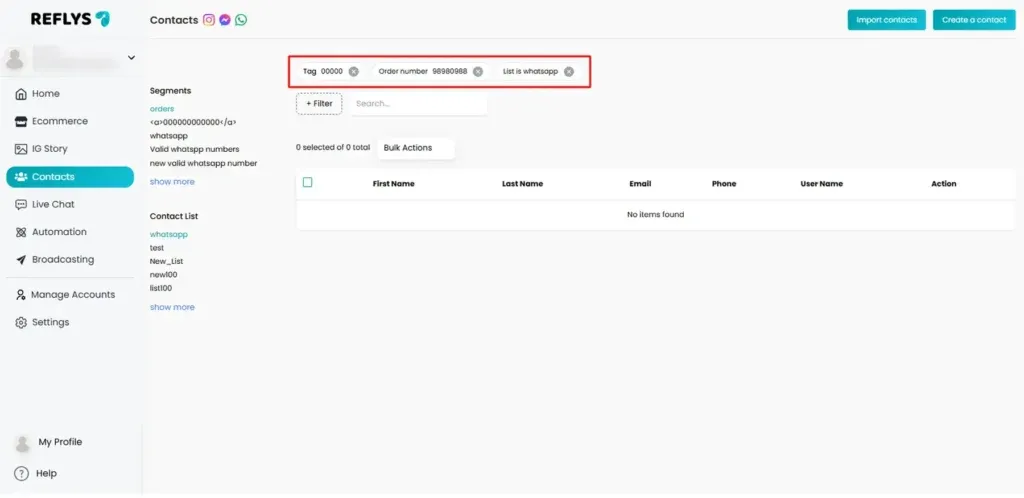
(Tip: You can add Tags or Custom Fields manually to a contact or set them automatically in your automation flows.)
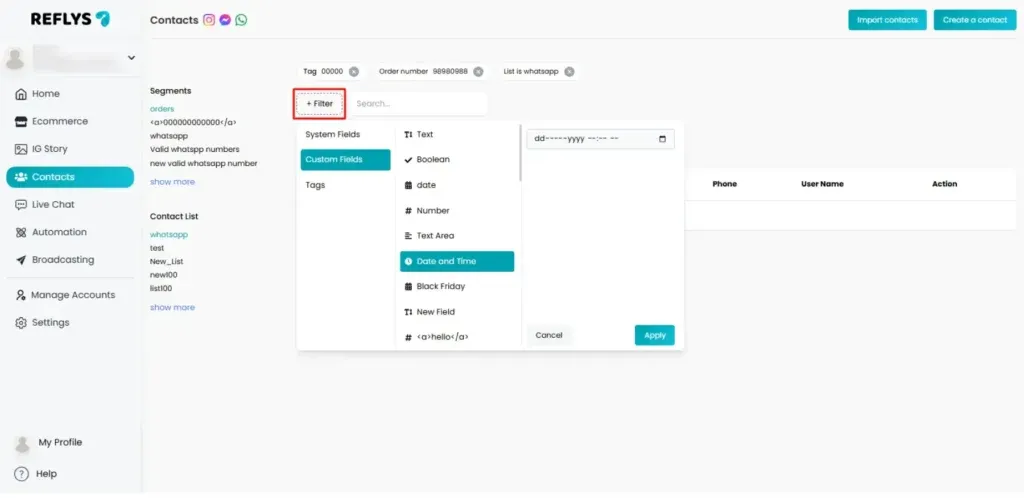
Step 3: Open Filters
- Inside the Contacts tab, click on Filter.
- A filter panel will appear where you can define conditions.
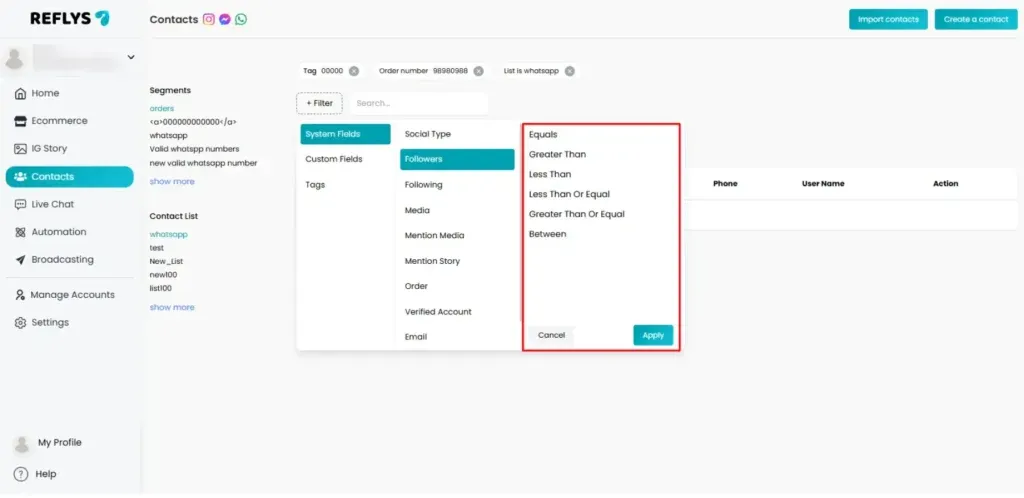
Step 4: Add Your Filter Conditions
- Tag → Example: Show only people with the tag “Interested in Shoes.”
- Custom Field → Example: People whose “Location” is “United States.”
- You can add multiple conditions together to make your audience more specific.
- contains equals / greater than / less than / less than or equal / greater than or equal / between (for fields like text, numbers, or dates)
Step 5: Create and Save the Segment
- Once your filters are ready, click on the Create Segment button (usually found at the right side of the filters panel).
- Give your segment a clear name, like “VIP Customers – Karachi” or “Webinar Leads – August.”
- Hit Save
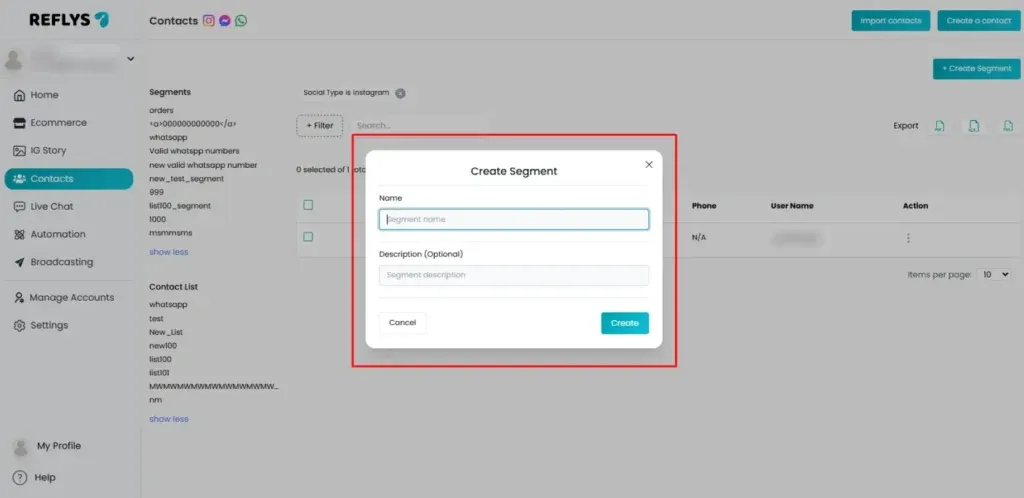
Now, you’ve successfully created a segment in Reflys!
Step 6: Use Your Segment Anywhere
- Your saved segments can be reused across Reflys.
- Send targeted broadcasts.
- Create automation rules.
- Choose contacts for campaigns.
By using segments, you don’t need to set filters again and again. Just pick the saved segment, and you’re ready to go.
Step 7: Update a Segment (Optional)
- Need to change a segment later? No problem.
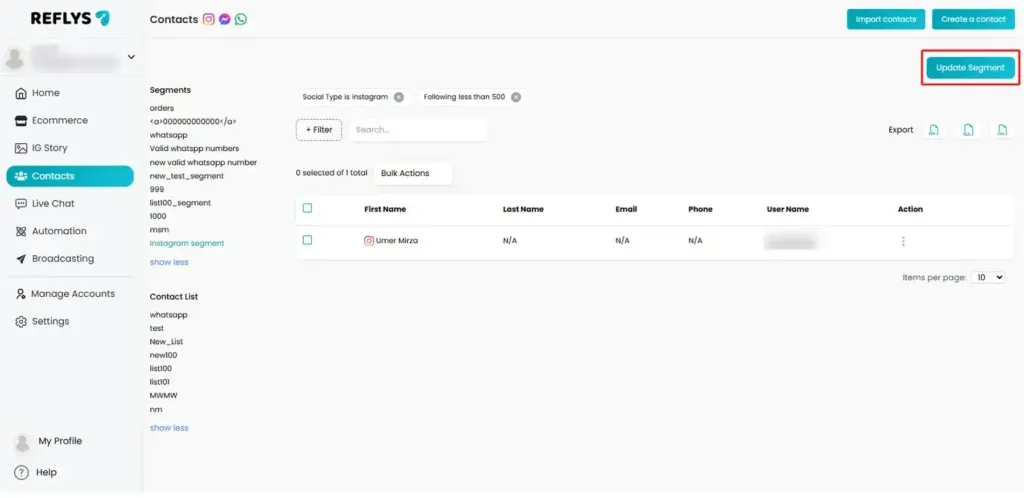
- Open your saved segment, adjust the filters (add or remove conditions), and click Update Segment.
- Your changes will be saved instantly.
Why Use Segments?
- Save time by reusing audience groups.
- Send more personalized and relevant messages.
- Increase engagement and conversions with the right targeting.
- Always stay organized when managing a large contact list