
How to Build Automation in Reflys
Reflys automations allow you to capture leads, reach customers, and respond in real time without any manual effort.
You can create custom flows when replying to Instagram DMs, welcoming WhatsApp contacts, or sending follow-ups after a Messenger interaction by using Reflys Automation Builder.
In this guide, you’ll learn:
- How to create your first automation in Reflys
- How to navigate the Flow Builder
- How to use different block types (Message, Action, Data Collection, etc.)
- How to set triggers to start your automation
- Best practices, tips, and FAQs
In the end, you will be able to create an automation that will work 24/7 leaving no more leads or messages missed.
Starting Your First Automation
To create an automation:
- Go to Automations in your Reflys dashboard.
- Click Add Automation.
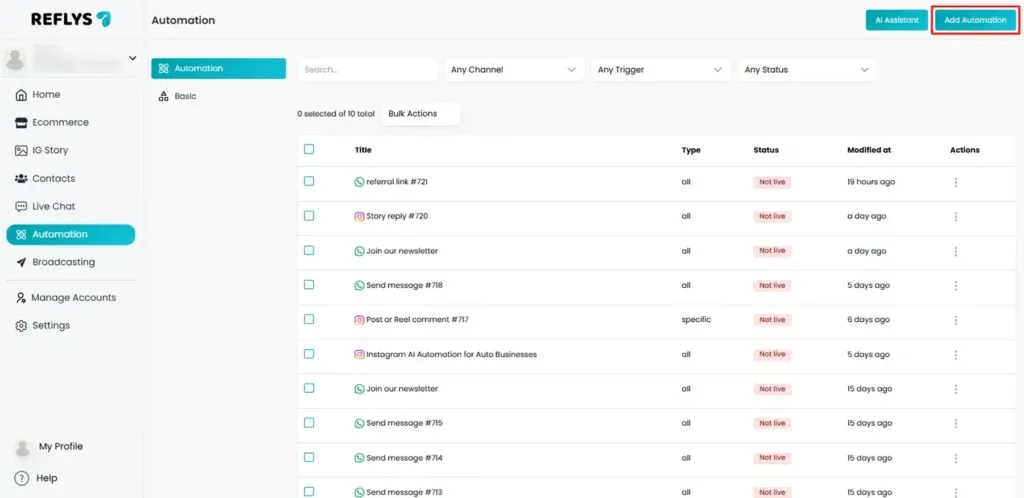
There are two options, which you will see:
- Templates: Automations that are ready to be created when they are needed the most (e.g., a comment-reply automation on Instagram or a WhatsApp welcome flow). Perfect to use for a short time.
- Start from Scratch: Build it with an empty canvas, and create it all step-by-step.
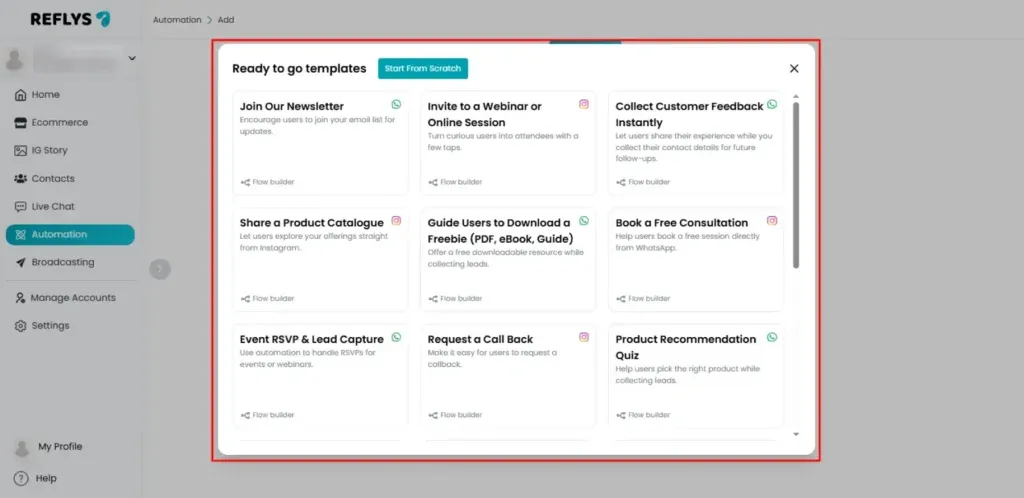
Tip: Beginners can start with a template and then customize it to suit their needs. Advanced users can start from scratch for complete control.
Adding Triggers
Before creating an automation, choose a channel such as WhatsApp, Instagram, or Messenger. In Reflys, you can set triggers for:
- A specific keyword in a DM (“Guide” → start flow)
- An Instagram comment on a post/reel
- A WhatsApp message from a new contact
- A Story mentioned
- A referral link click
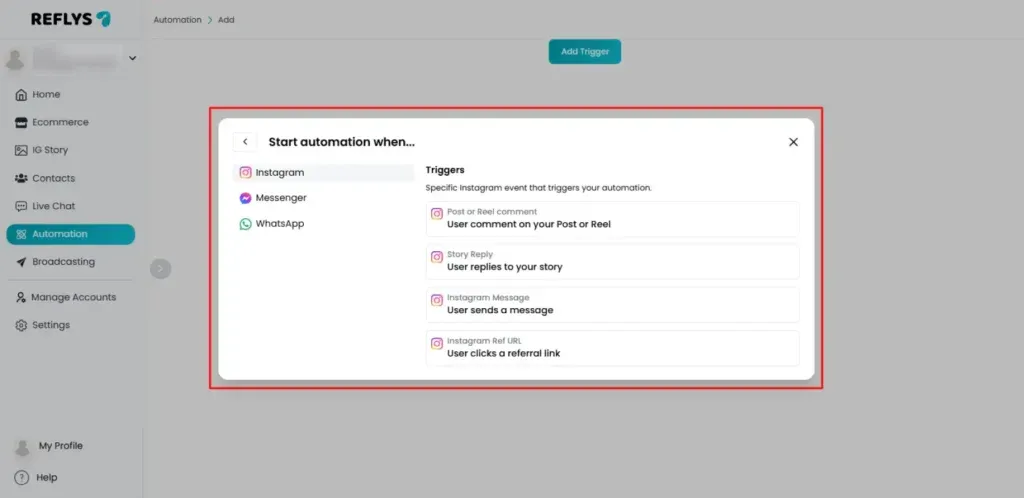
To add a trigger:
- In the Starting Step, choose Instagram or any channel you want to use.
- Select your trigger type. I.e, user sends a message or user comments on a post
- Select a way to trigger automation, such as detecting specific words in a message or recognizing the intention of the message.
- Rename your automation and click it to save to proceed with your automation
Understanding the Flow Builder
The Flow Builder in Reflys is a drag-and-drop visual editor for your automation.
Main Areas:
- Rename your automation
- Preview or publish your automation
- Switch between Flow Builder and Basic Builder (a simple linear view)
- + icon to add blocks (Message, Action, Condition, etc.)
- Auto-arrange button to keep your flow tidy
- Zoom controls to navigate large flows
- Where you can place and connect your blocks
- Click + New Trigger to choose how your automation starts
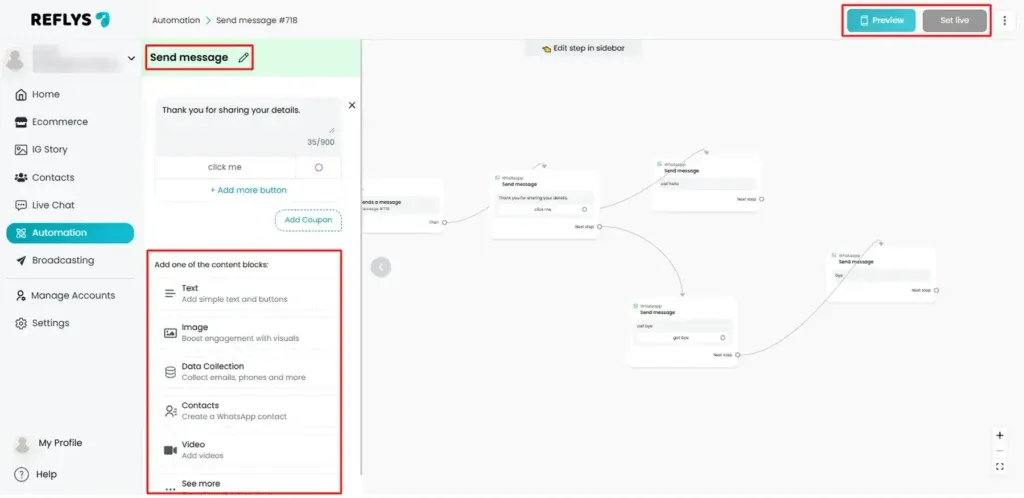
Building an Automation – Step by Step
Let’s build an example automation for capturing Instagram leads.
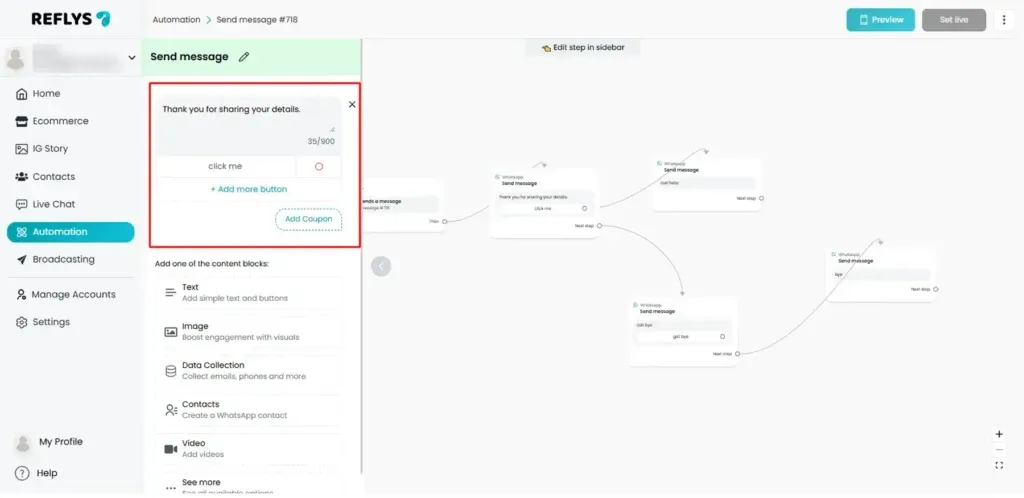
Step 1 – Add a Message Block
- A Message Block sends text, images, videos, or buttons to your user.
- For example: “Hi! Thanks for reaching out! Want to grab our free guide?” with the button “Yes, send it”
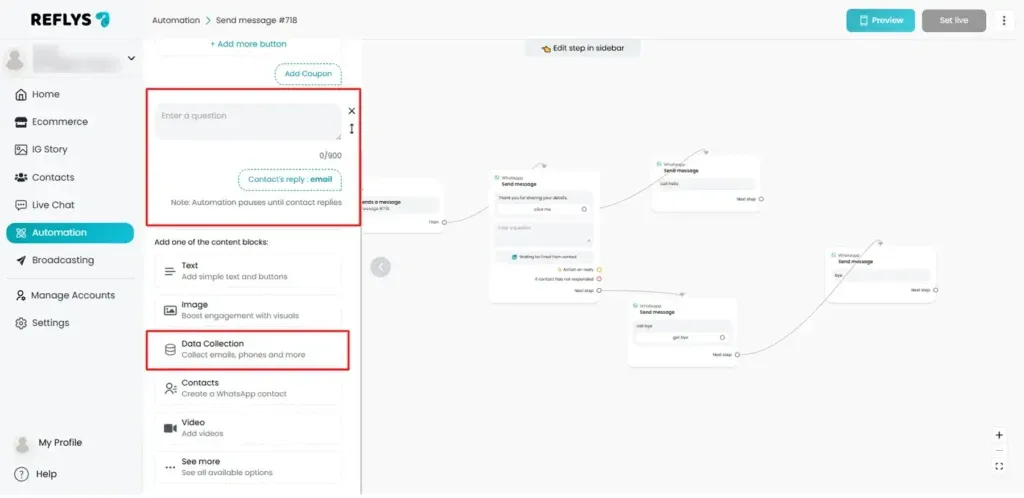
Step 2 – Add a Data Collection Block
- Use this block to ask for and save user info (e.g., name, email, phone).
- For lead magnets, ask: “Share your email address.”
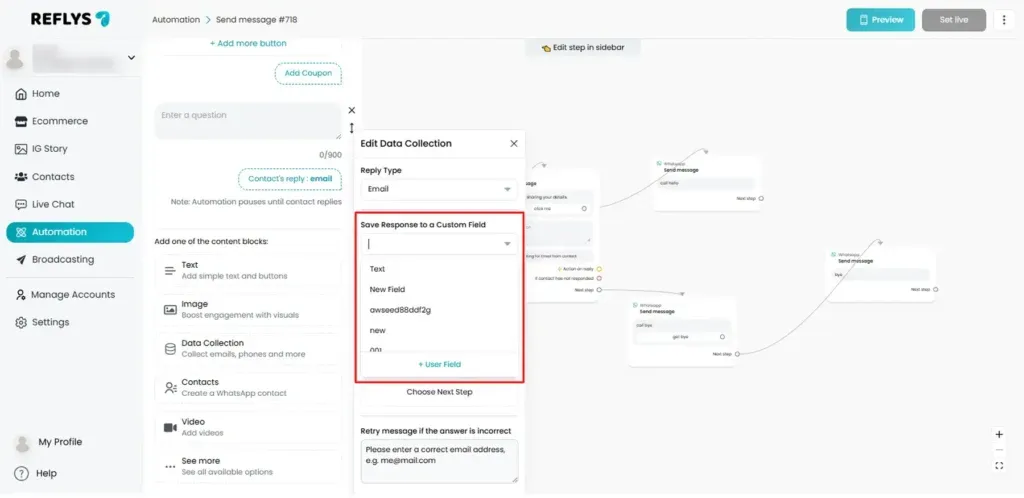
- You can also save user information to a Custom Field in Reflys so you can use it later for email campaigns.
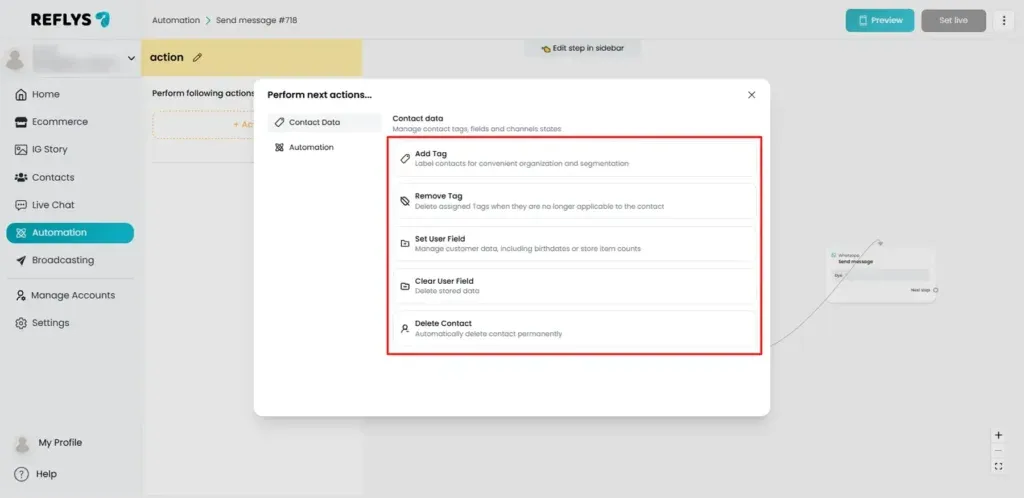
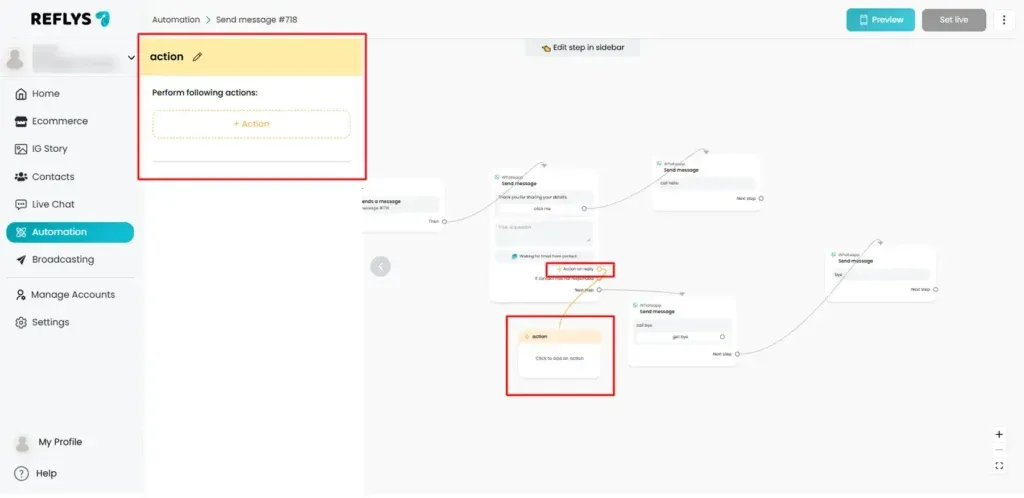
Step 3 – Add an Action Block
- Action Blocks tell Reflys to do something in the background.
- Example: When a user clicks “Yes, send it,” add the action Tag: Interested in Guide.
- Other actions include: subscribing to a sequence, notifying an admin, opening a live chat.
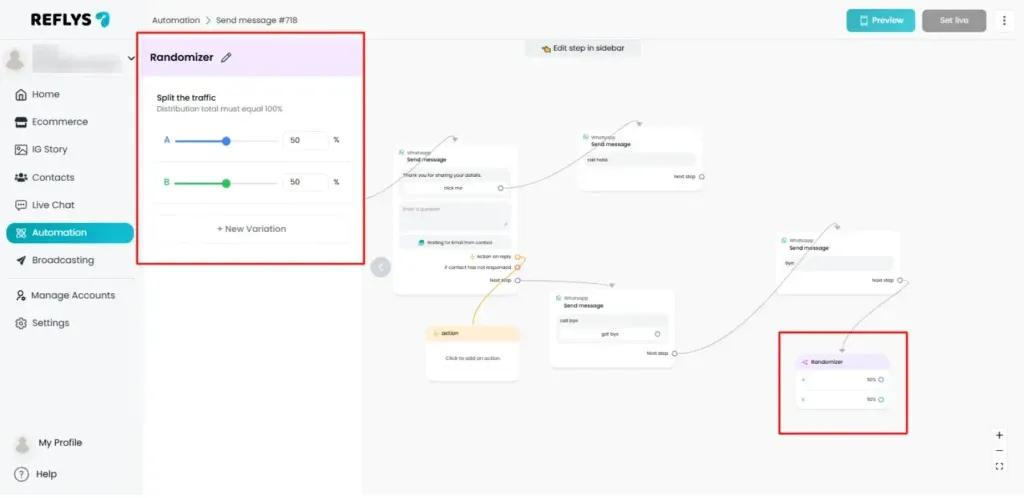
Step 4 – (Optional) Add a Randomizer Block
- Test different replies or offers by splitting traffic (e.g., 50% see Version A, 50% see Version B).
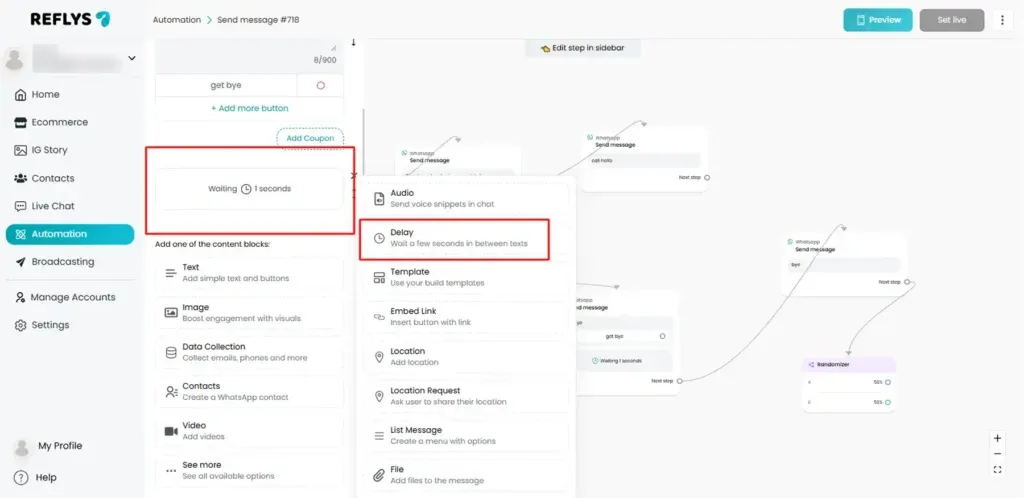
Step 5 – Add a Smart Delay
- Space out your messages so they don’t feel spammy.
- Example: Wait 2 hours after sending the guide, then follow up with: “Did you get a chance to check it out?”
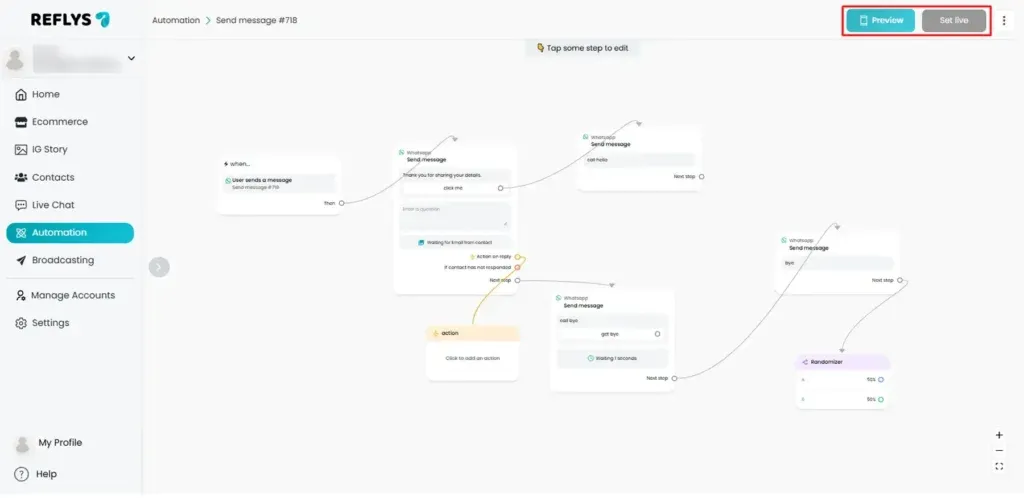
Step 6 – Preview and Set it to Live
Once you are done completing your automation steps, click to preview or publish your automation through the upper-right corner button in the Flow Builder.
Tips for Better Automations
- Keep messages short and conversational
- Use buttons for easy responses
- Tag and segment contacts for future targeting
- Always test your flow by previewing before publishing
- Name your flows clearly (e.g., “IG – Lead Magnet – PDF Download”)