
WooCommerce Installation Guide
It is easy to connect your WooCommerce store with Reflys. Reflys enables you to manage your automation, customer chats, and sales in one dashboard, eliminating the need to switch between multiple apps. The following step-by-step tutorial will help you in integrating your WooCommerce store with Reflys for the first time.
Step 1: Open Your Reflys Dashboard
- Go to Reflys, enter your email and click Continue.
- Enter your password and click Log in.
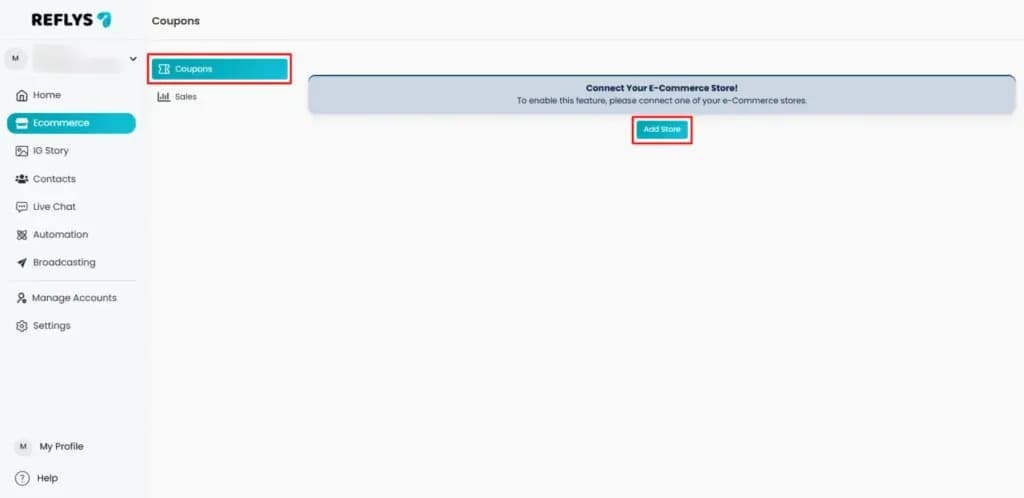
- In the dashboard, click Ecommerce in the sidebar.
- If no store is connected yet, you see Connect Your Ecommerce Store! with an Add Store button. Only the account owner sees this button.
Note: Each brand in Reflys connects to one store: WooCommerce, Shopify, or BigCommerce. To connect another store, add a new brand from the Brands page and connect the store there. Each brand has its own plan.
Step 2: Add Your Store
- Click on the Add Store button in the Ecommerce section.
- The Add Store window opens. Open the --Select Store-- list.
- Choose WooCommerce from the list.
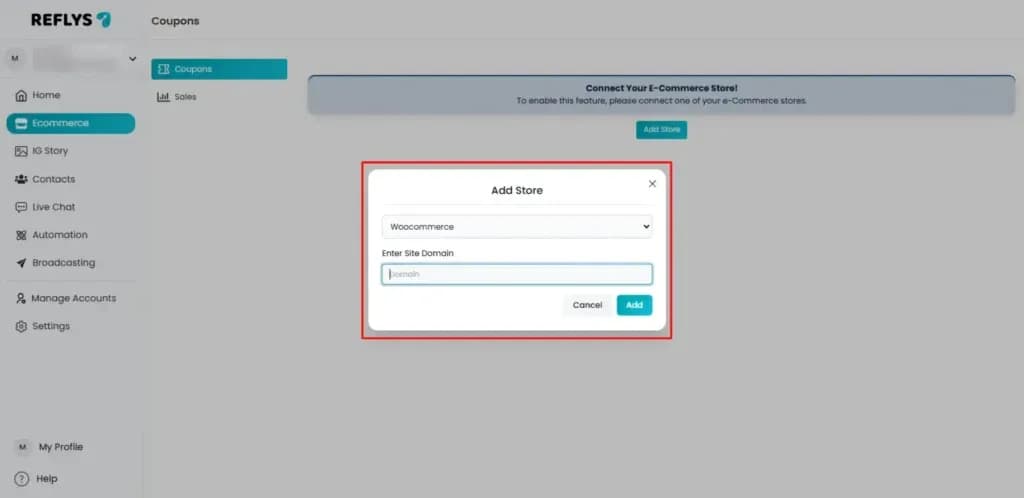
Once you choose WooCommerce, an Enter Site Domain field appears. Type the domain of your WooCommerce site there.
Step 3: Enter Your WooCommerce Store URL
- Example: yourstore.com
- Leave out https:// and http://. Reflys always connects to your store over https.
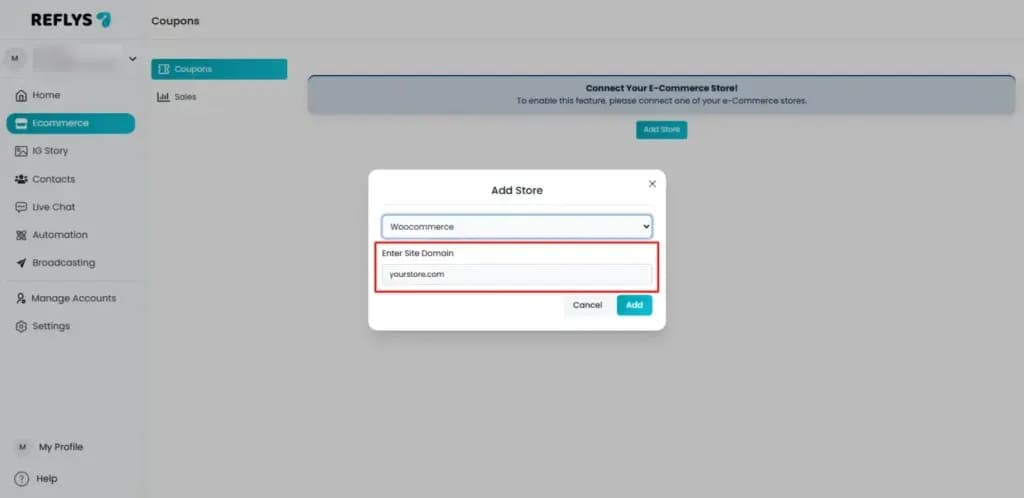
- Click on Add.
Reflys will now redirect you to your WooCommerce site to proceed with the connection process.
Step 4: Log in to Your WooCommerce Site
You can skip this step if you are already logged in to your WooCommerce site.
If not:
- Enter your WordPress Admin username or email.
- Enter your password.
- Click Log In to access your website.
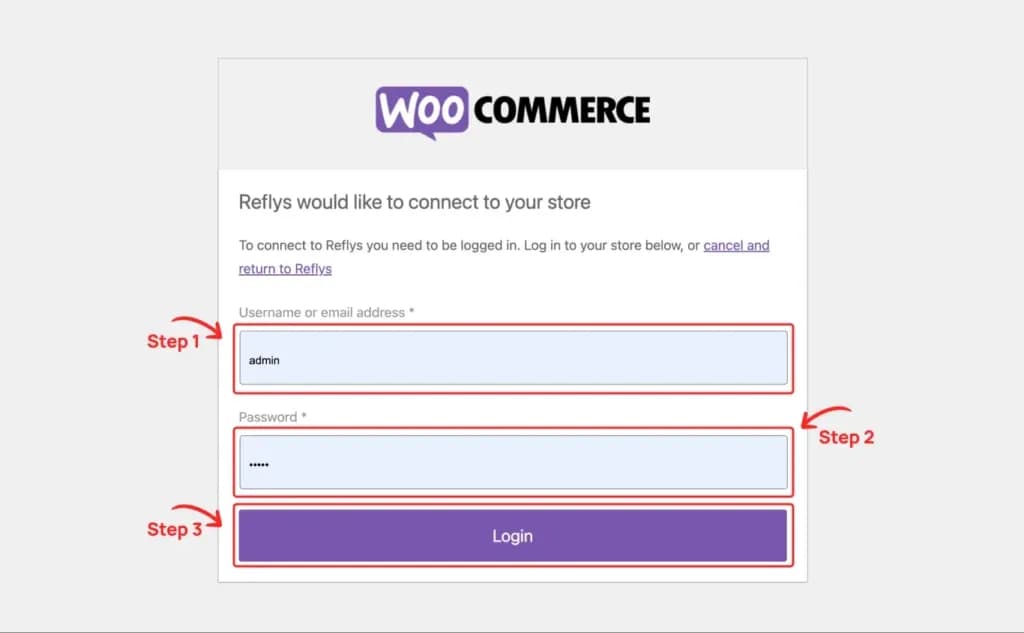
After logging in, the WooCommerce OAuth screen (permission request page) shows up.
Step 5: Approve the Connection
That OAuth screen will request you to approve the connection between your WooCommerce store and Reflys.
- Review the permissions. Reflys asks for read and write access so it can read your products and orders and create discount codes in your store.
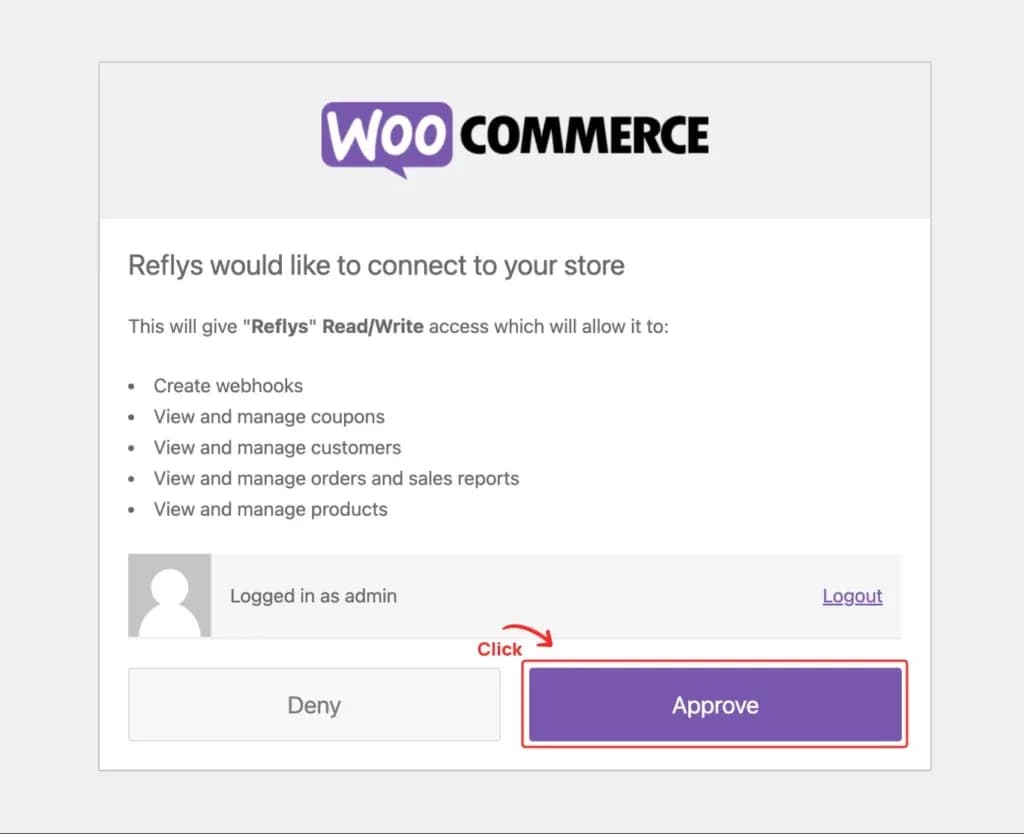
- Click Approve.
After you approve, WooCommerce sends the connection keys to Reflys and returns you to the Reflys dashboard.
Step 6: Confirm Your Store Connection
After redirection, you will land back on Reflys.
- Go to Brands in the sidebar. Your store is listed with the WooCommerce icon, its name and its domain.
- Go to Ecommerce. The Connect Your Ecommerce Store! prompt is gone and you see your Coupons list instead.
If you still see the Add Store prompt, refresh the page. If it is still there, repeat the steps and make sure you clicked Approve.
Step 7: Start Using Reflys with WooCommerce
All done! Your WooCommerce is successfully connected with Reflys.
Here’s what you can do next:
- Automate Conversations
Set up automated replies for WhatsApp, Instagram, or Facebook messages to instantly respond to customer queries. - Capture Leads
Collect emails, phone numbers, or order details right inside the chat flow. - Manage Orders & Interactions
Get order notifications, send confirmations, and track customer activity, all without leaving Reflys. - Run Campaigns
Create broadcast campaigns or automated workflows to boost engagement and sales.
You can also watch a YouTube video to integrate your WooCommerce store with your Reflys account.
Tips and Troubleshooting
- Switching Stores:
Each brand connects to one store, and you don't need to disconnect WooCommerce to add another. To connect a Shopify or BigCommerce store as well, go to Brands, click Add New Brand, then connect the other store from Ecommerce in the new brand. - Incorrect URL Error:
If you see Please enter domain without http or https, or Enter your store domain, for example yourstore.com., check the spelling and enter only the domain, such as yourstore.com. If you see This store is already connected to another account., the store is linked to a different Reflys account. - Permission Issues:
In case Reflys is not able to reach your WooCommerce store, make sure that your WooCommerce connection and WordPress version are up to date.
Need Help?
Contact us through Help & Support in your Reflys dashboard, or at support@reflys.com.